The allure of a Christmas tree adorned with shimmering, transparent ornaments is undeniable. These delicate beauties catch the light, casting playful reflections and adding an ethereal glow to your festive decorations. While store-bought clear ornaments can be beautiful, crafting your own allows for unparalleled personalization, creativity, and the joy of creating something truly unique. This comprehensive guide will walk you through the process of making stunning clear craft Christmas ornaments at home, from choosing the right materials to mastering various filling and decorating techniques. Prepare to transform simple clear ornaments into dazzling heirlooms that will be cherished for years to come.
The Foundation: Choosing Your Clear Ornament Base

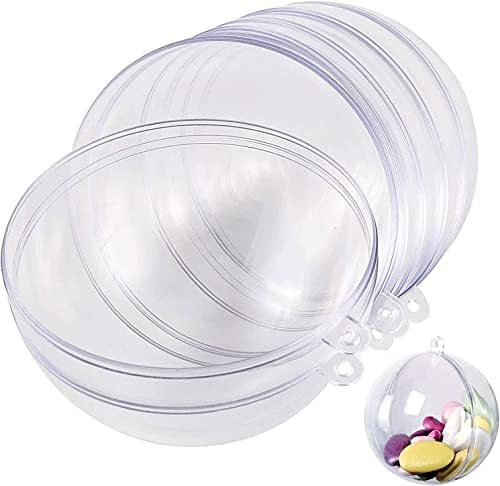
The cornerstone of any stunning clear ornament is its transparent shell. Fortunately, the craft market offers a variety of excellent options, each with its own advantages. Understanding these choices will help you select the perfect base for your vision.
Plastic vs. Glass: A Tale of Durability and Aesthetics
When selecting your clear ornament base, you’ll primarily encounter two materials: plastic and glass. Both have their merits, and the best choice often depends on your intended use and crafting style.
-
Plastic Ornaments: These are often the more budget-friendly and beginner-friendly option.
- Pros: Lightweight, durable (less prone to shattering), readily available in various shapes and sizes, easy to work with for intricate fillings.
- Cons: Can sometimes have a less premium feel or be prone to scratches over time compared to glass.
-
Glass Ornaments: For a more classic and luxurious feel, glass ornaments are an excellent choice.
- Pros: Superior clarity and shine, a more premium and delicate aesthetic, a satisfying weight.
- Cons: Fragile and prone to breaking, requiring more careful handling during crafting and display.
For many DIY crafters, particularly those experimenting with diverse fillings, plastic ornaments offer a forgiving and versatile starting point. However, for a truly elegant and heirloom-quality finish, glass ornaments are hard to beat.
Shapes and Sizes: Unleash Your Imagination
Clear ornaments are no longer limited to the classic round ball! The crafting world has embraced a vast array of shapes and sizes to cater to every creative whim. Consider these popular options:
- Spheres: The timeless classic, perfect for a multitude of fillings and decorative techniques. Available in sizes ranging from tiny baubles to substantial statement pieces.
- Teardrops and Icicles: Add an elegant, cascading effect to your tree.
- Stars, Hearts, and Geometric Shapes: Offer a modern and thematic twist.
- Animals, Snowflakes, and Themed Shapes: Perfect for creating a cohesive narrative or for specific holiday themes.
The size of your ornament will also influence your filling choices. Larger ornaments allow for more substantial items, while smaller ones are ideal for delicate embellishments or layered effects.
Filling Your Clear Canvas: A World of Possibilities

This is where the magic truly happens! The transparent nature of these ornaments invites you to fill them with a breathtaking array of materials, transforming them into miniature works of art. Here are some of the most popular and impactful filling techniques:
The “Snowy Scene” Effect

Recreate a winter wonderland inside your ornament with this classic technique. It’s surprisingly simple yet incredibly effective.
- Materials: Faux snow (fine glitter, iridescent glitter, cotton batting), miniature figurines (deer, trees, houses), small pinecones, Epsom salts (for a frosted look).
- Technique:
- Ensure your ornament is clean and dry.
- Gently spoon or funnel faux snow into the ornament. Experiment with different densities for varied effects.
- Carefully add miniature figurines and other decorative elements using tweezers or a thin stick.
- You can layer Epsom salts over the snow for an extra frosty touch.
- Close the ornament securely and give it a gentle shake to settle the contents.
Case Study: Sarah, a DIY blogger, shared her “Enchanted Forest” ornaments using this technique. She filled clear glass spheres with a mix of iridescent glitter, tiny bottle-brush trees, and miniature woodland creatures. The result was a collection of enchanting miniature dioramas that were a huge hit with her followers.
Glitter Galore: Sparkle and Shine
Glitter is synonymous with Christmas, and clear ornaments provide the perfect vehicle for its dazzling display. You can use loose glitter or specialized glitter glue for varied effects.
- Materials: Various colors and sizes of glitter (fine, chunky, holographic), glitter glue, a funnel.
- Technique for Loose Glitter:
- Pour a generous amount of your chosen glitter into the ornament using a funnel.
- You can layer different colors for a multidimensional effect.
- Close the ornament and shake it vigorously to distribute the glitter evenly.
- Technique for Glitter Glue:
- Squeeze a small amount of glitter glue into the ornament.
- Swirl the ornament gently to coat the inside with a thin layer of glue.
- Pour in additional glitter and swirl again to create an embedded glitter effect.
- Allow the glue to dry completely before sealing.
Statistic: According to a survey by a popular craft supply retailer, glitter-filled ornaments consistently rank as one of the top DIY Christmas craft projects, with over 70% of respondents expressing a desire to create them.
Layered Liquids: A Mesmerizing Display
Creating layered liquid effects within clear ornaments offers a sophisticated and mesmerizing visual. This technique requires a bit more precision but yields stunning results.
- Materials: Clear craft glue, water, food coloring (or alcohol inks), glitter, small decorative items (optional).
- Technique:
- Mix a small amount of clear craft glue with a few drops of food coloring.
- Fill the ornament about one-third full with this colored glue mixture.
- Carefully add a layer of clear water, leaving some space at the top. The difference in density will create distinct layers.
- You can add a layer of glitter between the glue and water for added sparkle.
- Gently swirl the ornament to create subtle color blending, or leave them distinct for a sharp, graphic look.
- Add more colored glue or water layers as desired, always leaving space at the top.
- Seal the ornament tightly.
Tip: For alcohol inks, add them directly to the water layer for vibrant, translucent hues that blend beautifully.
Natural Elements: Bringing the Outdoors In
Embrace the beauty of nature by incorporating natural elements into your clear ornaments. This brings an organic and rustic charm to your decorations.
- Materials: Small dried flowers, tiny pinecones, cinnamon sticks, star anise, dried leaves, small feathers.
- Technique:
- Ensure all natural elements are completely dry to prevent mold.
- Carefully arrange the elements inside the ornament, using tweezers or a thin stick for placement.
- You can combine natural elements with a light dusting of faux snow or a few strands of twine for an extra touch.
- Seal the ornament.
Example: A set of clear ornaments filled with tiny sprigs of dried lavender and a single star anise offers a subtle, fragrant, and visually appealing Christmas decoration.
Photos and Memories: Personalize Your Tree

What could be more personal than incorporating cherished photos into your Christmas ornaments? This is a wonderful way to relive precious memories during the holidays.
- Materials: Printed photos (small enough to fit, or cut into strips), twine or ribbon.
- Technique:
- Print your photos, ensuring they are slightly smaller than the opening of your ornament. You can print them as small strips for easier insertion.
- Carefully roll or fold the photo and insert it into the ornament.
- Use a thin stick or the end of a pencil to unfurl and position the photo inside.
- You can add a small length of twine or ribbon to the inside for an extra decorative element.
- Seal the ornament.
Idea: Create a “Year in Review” ornament by filling it with photos from significant events of the past year.
Beyond the Fillings: Decorating the Exterior

While the interior of your clear ornament holds immense appeal, the exterior offers another canvas for creativity. Elevate your ornaments with these external decorating techniques.
Painting and Decoupage: Artistic Touches
Transform plain clear ornaments into artistic statements with a touch of paint or the elegance of decoupage.
- Materials: Acrylic paints, paintbrushes, stencils, mod podge, decorative paper or napkins.
- Technique for Painting:
- Clean the exterior of the ornament thoroughly.
- Use stencils for precise designs or freehand paint for a more organic look.
- Allow the paint to dry completely between layers.
- Technique for Decoupage:
- Cut out desired images or patterns from decorative paper or napkins.
- Apply a thin layer of mod podge to a section of the ornament.
- Carefully lay the paper or napkin onto the mod podge, smoothing out any wrinkles.
- Apply another layer of mod podge over the top to seal and protect.
- Repeat until the ornament is covered.
Tip: For a distressed look, use sandpaper lightly over painted or decoupaged areas after they’ve dried.
Ribbons and Embellishments: Adding Texture and Flair
The finishing touches can make all the difference. Ribbons, bows, and other embellishments add texture, depth, and a polished look.
- Materials: Various ribbons (satin, velvet, burlap), twine, small beads, faux pearls, glitter glue pens, hot glue gun.
- Technique:
- Tie a decorative bow around the cap of the ornament.
- Wrap twine or ribbon around the ornament for a rustic or elegant band.
- Glue small beads or pearls onto the exterior for a subtle shimmer.
- Use glitter glue pens to draw designs or outlines.
Style Note: For a whimsical touch, consider attaching a small jingle bell to the ribbon loop.
Tips for Success and Troubleshooting
Even the most experienced crafters encounter occasional hiccups. Here are some tips to ensure your clear ornament crafting journey is smooth and enjoyable:
- Cleanliness is Key: Always ensure your ornaments and all filling materials are clean and dry before starting. This prevents moisture buildup and potential mold.
- Use a Funnel: For small openings, a funnel is your best friend for inserting loose materials without making a mess.
- Tweezers are Your Friends: For delicate placement of small items, tweezers are indispensable.
- Patience is a Virtue: Allow paint and glue to dry completely between steps to avoid smudging or unwanted color bleeding.
- Test Your Fillings: If you’re unsure about how a material will look or react, test it in a spare ornament first.
- Seal Tightly: Ensure the cap is sealed securely, especially if using liquids, to prevent leaks.
Troubleshooting: If you accidentally overfill an ornament with loose materials, gently tap the sides to help it settle. For smudges on the exterior, try carefully wiping with a slightly damp cloth (for paint) or rubbing alcohol (for some adhesives).
Creating stunning clear craft Christmas ornaments at home is a rewarding and deeply personal endeavor. From the humble beginnings of a transparent shell to the final flourish of a decorative ribbon, each step offers an opportunity for creativity and self-expression. By understanding your material choices, mastering various filling techniques, and adding thoughtful external decorations, you can craft a collection of ornaments that are not only beautiful but also imbued with meaning and memories. Whether you choose to recreate snowy landscapes, unleash a torrent of glitter, layer vibrant liquids, or preserve cherished photographs, the possibilities are truly endless. Embrace the spirit of DIY, let your imagination soar, and transform your holiday tree into a breathtaking spectacle of crystal brilliance.