Creating an organized and functional closet space can make a significant difference in your daily life. Whether you’re dealing with a small apartment or a spacious home, having a well-structured closet can save you time and reduce stress. DIY closet solutions, particularly installing your own brackets and rods, can be an empowering and cost-effective way to enhance your storage capabilities. In this article, we will explore the benefits of DIY closet solutions, guide you through the installation process, and provide tips to maximize your closet’s potential.
Why Choose DIY Closet Solutions?
Opting for DIY closet solutions has numerous advantages, including:
- Cost-Effective: Hiring a professional can be expensive. By doing it yourself, you can save on labor costs and invest in higher quality materials.
- Customizable: You can tailor the design to fit your specific needs and preferences, ensuring that the final product is functional and aesthetically pleasing.
- Sense of Accomplishment: Completing a DIY project can boost your confidence and provide a sense of achievement.
- Flexible Design: As your needs change over time, you can easily modify or expand your closet system.
Understanding the Basics of Closet Organization
Before diving into the installation of brackets and rods, it’s important to understand the basic principles of closet organization. This involves evaluating your storage needs and planning accordingly. Here are some factors to consider:
- Assess Your Space: Measure your closet dimensions, including height, width, and depth. This will help you determine how many rods and shelves you can install.
- Identify Your Storage Needs: Consider the types of clothing and accessories you store. Do you need long hanging space for dresses or short hanging space for shirts? How many shelves will you need for shoes or bags?
- Plan Your Layout: Sketch a rough layout of your design, indicating where you will place rods, shelves, and any additional features like drawers or baskets.
Materials Needed for Your DIY Closet Project

Equipping yourself with the right materials is crucial for a successful installation. Here’s a list of items you will need:
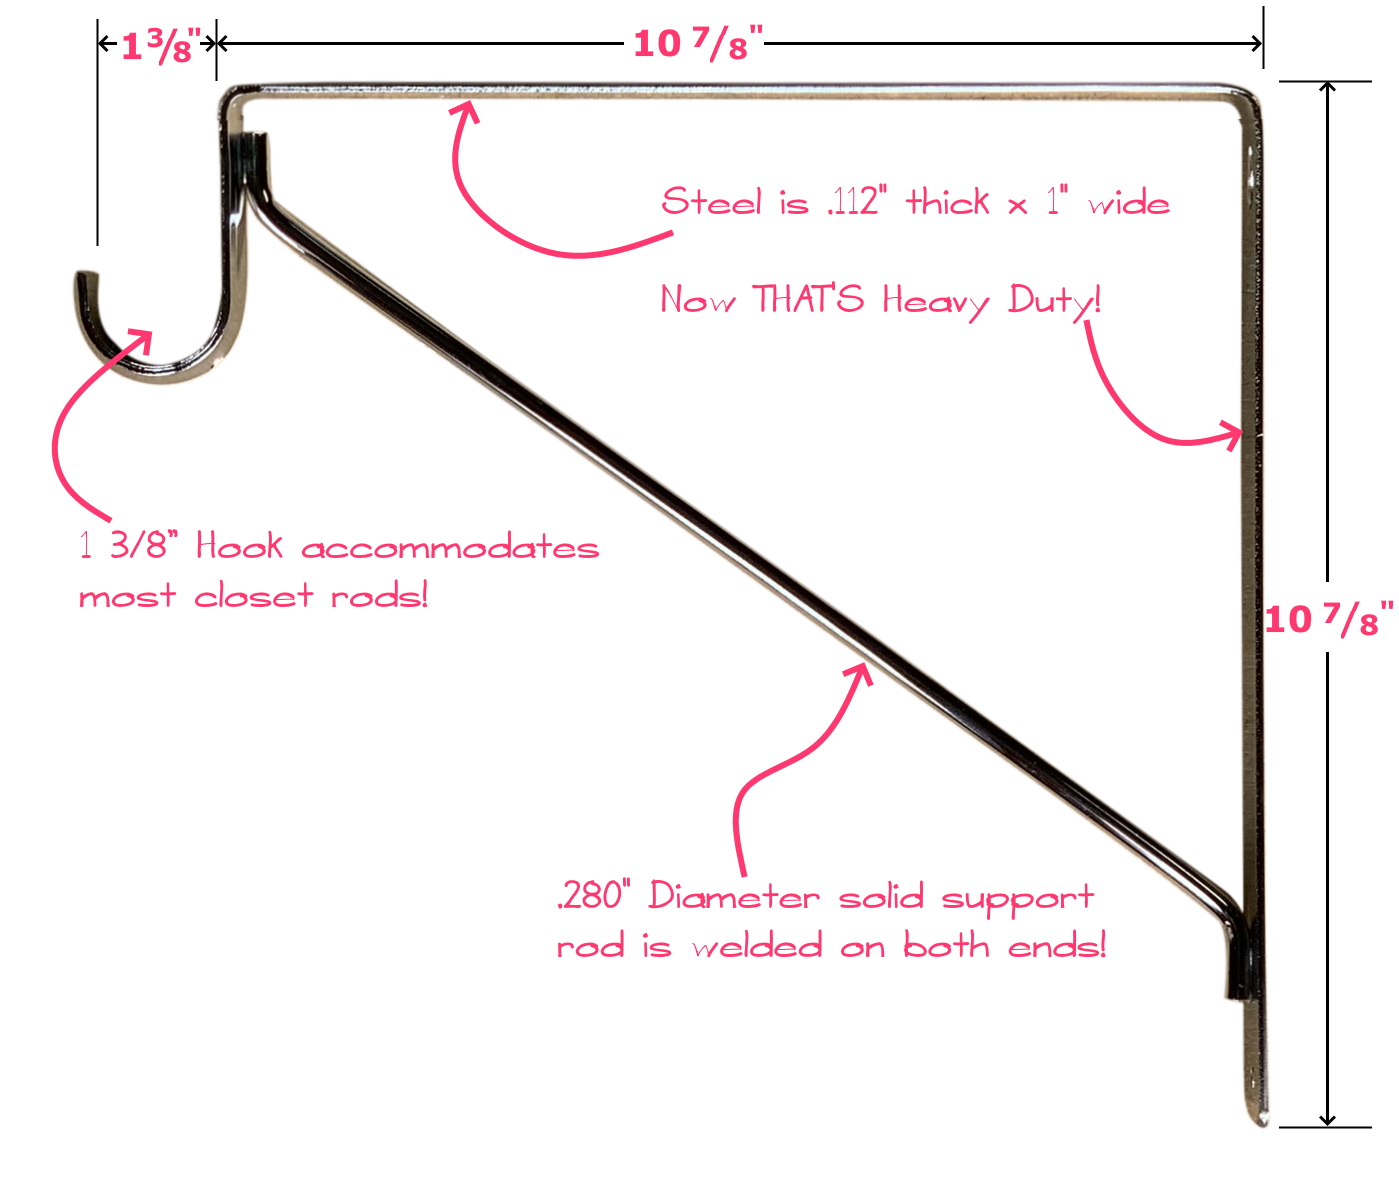
- Brackets: Choose sturdy brackets that can support the weight of your rods and hangers.
- Rods: Metal or wooden rods are common choices, depending on your preference and style.
- Wall Anchors: If you’re installing brackets on drywall, wall anchors will provide additional support.
- Screws: Ensure you have screws that are compatible with your brackets and wall type.
- Level: A level will help ensure that your rods and shelves are straight.
- Drill: A power drill will make the installation process easier and more efficient.
- Tape Measure: For accurate measurements.
- Pencil: To mark the spots where you will install your brackets and rods.
Step-by-Step Installation Guide
Now that you have assessed your space and gathered your materials, it’s time to install your closet brackets and rods. Follow these steps for a successful installation:
Step 1: Mark Your Measurements
Using your tape measure, determine where you want your rods to be placed. A common height for hanging clothes is between 60 to 72 inches from the floor. Mark your measurements on the wall with a pencil.
Step 2: Install the Brackets
Align the brackets with your pencil marks and use a level to ensure they are straight. Drill holes into the wall and insert wall anchors if necessary. Secure the brackets with screws, ensuring they are tightly fastened.
Step 3: Attach the Rods
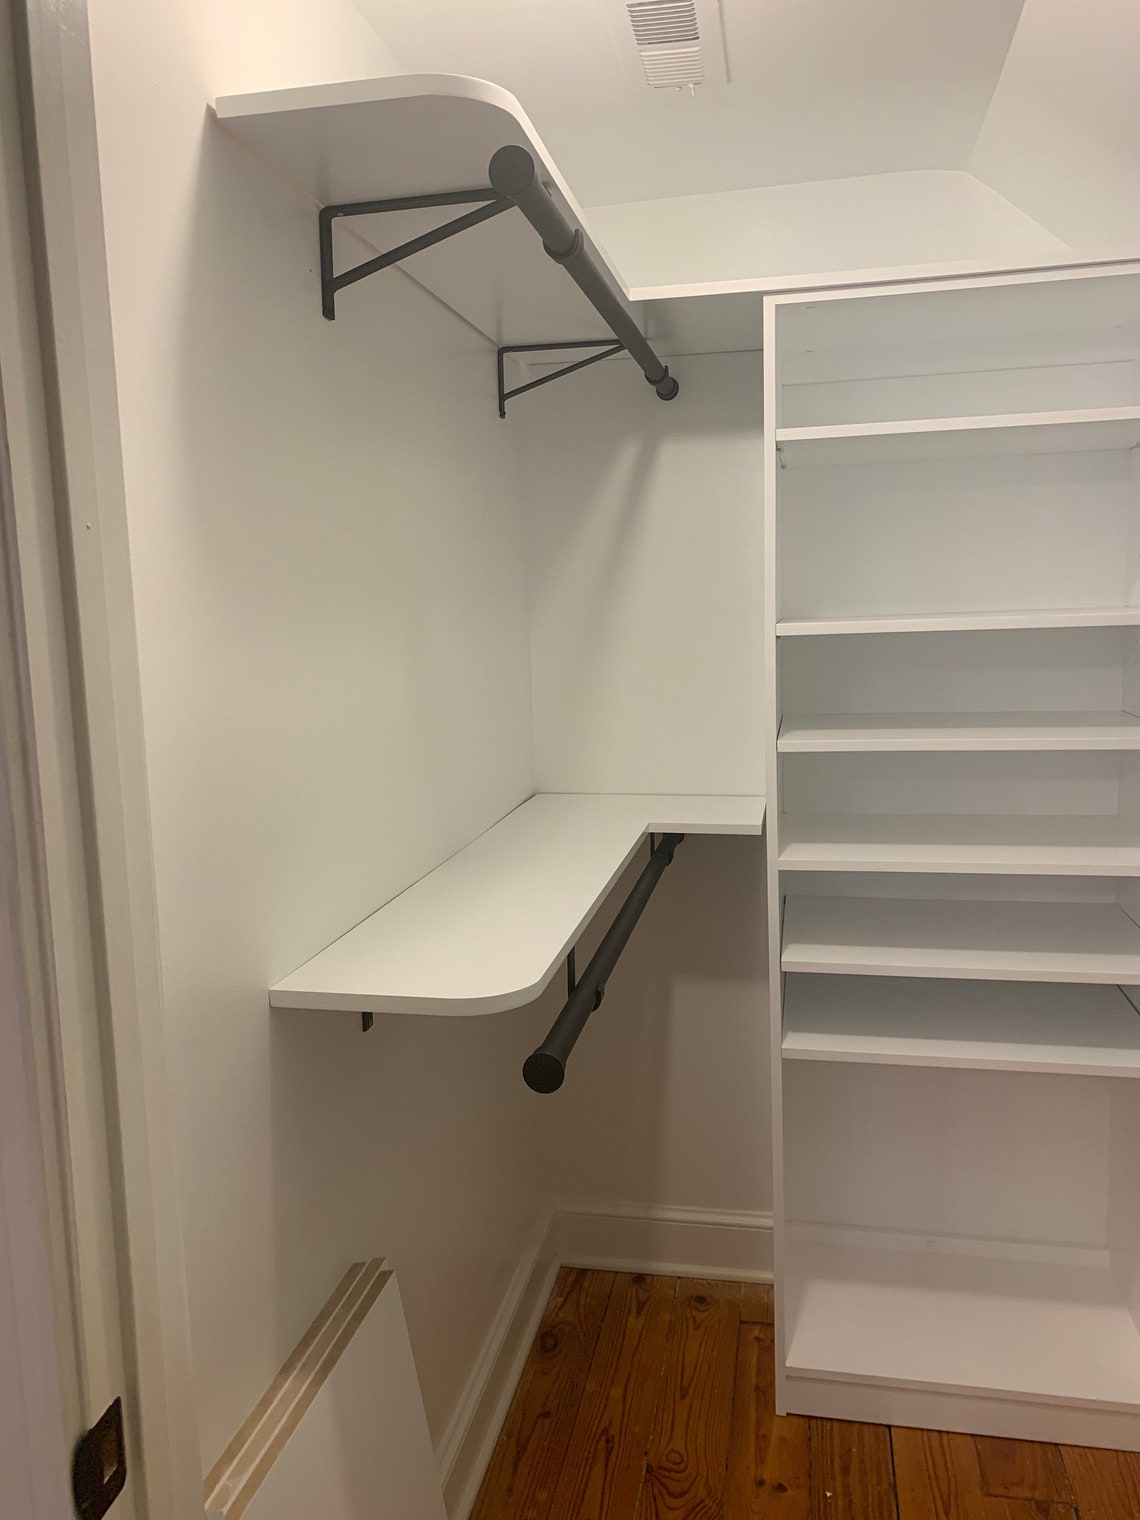
Once the brackets are securely installed, slide the rods into place. Make sure they are properly seated in the brackets and test their stability.
Step 4: Customize with Shelves

If you plan to add shelves, repeat the measuring and installation process for those, ensuring they are at a comfortable height for easy access.
Step 5: Final Touches

After installation, organize your clothing and accessories. Consider adding bins or baskets for smaller items to keep your closet looking tidy.
Maximizing Your Closet Space
Once you’ve installed your brackets and rods, it’s time to maximize your closet’s potential. Here are some tips:
- Use Vertical Space: Install additional shelves above the rods to take advantage of unused vertical space.
- Incorporate Hooks: Add hooks on the inside of the closet door for accessories, belts, or bags.
- Consider Adjustable Shelves: Use adjustable shelving systems that allow you to change the height as your storage needs evolve.
- Seasonal Rotation: Store out-of-season clothing in bins on high shelves to free up space for current wardrobe items.
Case Studies: Success Stories of DIY Closet Transformations
To inspire your DIY closet project, here are a couple of success stories:
Case Study 1: The Small Apartment Closet

A couple living in a small apartment struggled with a cramped closet that barely fit their clothes. They decided to install a double rod system, allowing for longer garments above and shorter garments below. They also added shelves above for shoes and bins for accessories. The result was a more organized closet that made it easier for them to find and access their items.
Case Study 2: The Family’s Shared Closet
A family with children needed a shared closet solution that catered to both adult and children’s clothing. They installed multiple rods at varying heights, ensuring that kids could reach their own clothes. Additional shelves were added for toys and shoes, creating a functional space that worked for everyone. This DIY transformation not only improved organization but also encouraged the children to take responsibility for their belongings.
Installing your own brackets and rods is a rewarding DIY project that can significantly enhance your closet’s functionality. By assessing your storage needs, gathering the right materials, and following a structured installation process, you can create a customized closet solution that meets your unique requirements. Additionally, by maximizing your space with clever organization techniques, you can maintain an orderly environment that simplifies your daily routine.
Whether you’re tackling a small closet in a rental apartment or creating a dream dressing room in your home, the satisfaction of a job well done and the added functionality of your space will make the effort worthwhile. Embrace the DIY spirit and transform your closet into a well-organized haven that reflects your style and meets your needs.